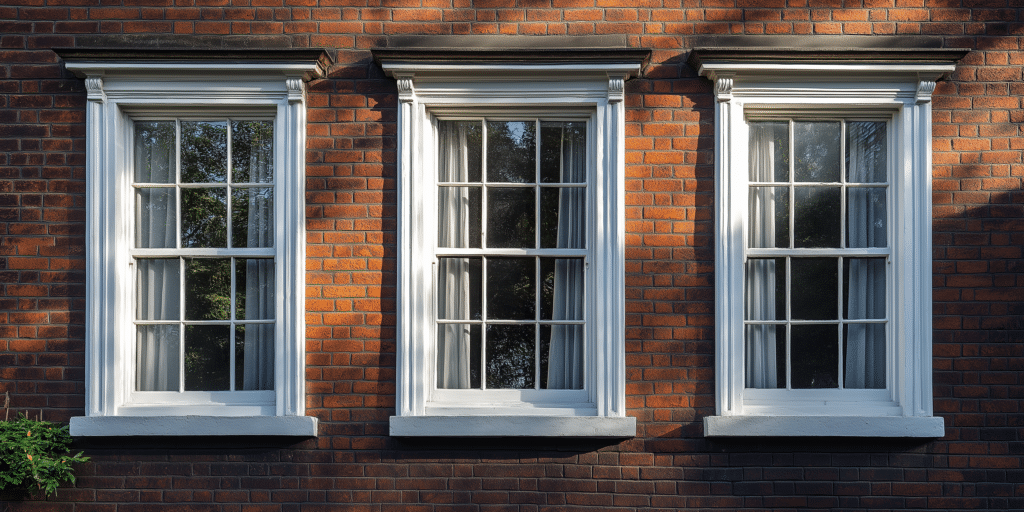
What is Sash Window Flashing?

Sash window flashing is a thin, typically metallic layer installed around windows to prevent water ingress and protect against weather elements. It channels water away from vulnerable areas as a barrier, helping avoid rot and structural weakening. Proper flashing is essential to maintaining both functionality and energy efficiency in sash windows, as it directly prevents issues like rot and heat loss.
Without flashing, sash windows are susceptible to moisture-related issues like rot, mould, and structural weakening, especially in regions with heavy rain or snow. Flashing mitigates these risks, enhancing the lifespan of sash windows. Studies suggest that well-installed flashing can extend window lifespan by up to 30%, shielding wood frames from moisture and temperature fluctuations.
Flashing is commonly applied along the window’s head, sill, and jambs—key areas prone to water infiltration. This placement maximises the window’s water-shedding capacity and creates a seal that shields the sash from external elements.
Flashing materials vary, with options like aluminium, copper, and lead being the most popular due to their durability and weather resistance. Some installations may use flexible, adhesive-backed flashing tapes for ease of application and additional sealing.
Types of Flashing for Sash Windows
- Head Flashing
Positioned above the sash window, head flashing prevents water from penetrating the top of the frame. It directs rainwater away from the window head and upper structure. - Sill Flashing
This flashing sits at the base of the window, protecting the sill and window frame from potential rot and mould buildup. It also aids in moisture drainage by guiding water outward. - Jamb Flashing
Installed along the sides of the window frame, jamb flashing seals the vertical edges, ensuring that water does not infiltrate the frame joints or wall cavities. - Flexible Flashing Tape
Often used as an additional sealant in modern sash window installations, flexible flashing tape provides a secondary layer of protection and adaptability to various frame designs, enhancing overall waterproofing.
Why Flashing is Important in Sash Window Installations
- Protection from Water Damage
Flashing prevents moisture ingress that can lead to wood rot, frame degradation, and paint peeling, all compromising sash window durability. Experts at Good Homes Magazine emphasise, “Custom flashing and draught-proofing systems not only protect the windows but also retain their historical look while enhancing durability.” - Enhancing Energy Efficiency
Properly installed flashing reduces drafts and air leaks, contributing to energy efficiency and helping maintain stable indoor temperatures by sealing the window perimeter. Statistics indicate that high-quality flashing can improve energy retention by 20%, which is particularly beneficial for period homes. - Supporting Structural Integrity
By shielding the window frame from elements, flashing maintains the integrity of both the sash window and surrounding structure, which is essential for long-term stability. Well-installed flashing safeguards the structural integrity of period windows. - Improving Aesthetic Appeal
Flashing can also be selected or customised to blend aesthetically with the sash window and exterior façade, giving a seamless, polished look.
Sash Window Flashing Installation: A Step-by-Step Guide

- Step 1: Preparing the Window Opening
Measure the window opening and inspect for any existing damage. Clear any debris and ensure the surfaces are dry and dirt-free to maximise adhesion. - Step 2: Applying the Sill Flashing
Cut the sill flashing to length and secure it in place, ensuring it covers the sill entirely and extends beyond the frame edges. This will direct water away from the base of the window. - Step 3: Installing Jamb Flashing
Attach jamb flashing to both vertical sides of the window, overlapping the sill flashing slightly to ensure continuous coverage. Be sure to check alignment to prevent any exposure gaps. - Step 4: Adding Head Flashing
Position the head flashing at the top of the window frame, extending slightly over the jamb flashing. This prevents water infiltration at the upper edges of the sash window.
Common Materials for Sash Window Flashing and Their Benefits
- Aluminium Flashing
Lightweight and corrosion-resistant, aluminium is a popular choice for sash window flashing due to its longevity and resistance to rust. It also accommodates a range of colours and finishes, making it versatile for both modern and period properties. According to Historic England, aluminium flashing is ideal for period properties where durability and aesthetic matching are essential. - Copper Flashing
Copper offers high durability and an attractive patina over time, which makes it ideal for traditional or period sash windows. Its longevity is notable, with well-maintained copper flashing often lasting over 50 years, especially when installed in sheltered areas. “Copper flashing has both the durability and timeless appeal suited to heritage buildings,” says Period Living magazine. - Lead Flashing
Often used in historic or conservation properties, lead flashing is flexible and can be shaped easily, making it a versatile choice for custom sash windows. It can last for decades and is known to withstand even extreme weather conditions. Due to its traditional look and reliability, lead is often the choice for high-end restoration projects. - Flashing Tape
Flashing tape is widely used in modern sash window installations for its ease of application and ability to create an airtight seal. Suitable for smaller budgets, it allows for quick installations and provides a secondary protective layer that reinforces metal flashing. Experts from Homebuilding & Renovating note that flashing tape is increasingly popular due to its cost-effectiveness and effectiveness in maintaining airtight seals.
How Flashing Contributes to the Durability of Sash Windows
- Minimising Water Intrusion
Flashing effectively channels water away, reducing the risk of rot and moisture damage, especially in wooden sash windows prone to warping and decay. Industry reports show that quality flashing can reduce moisture ingress by up to 30%, significantly prolonging the life of wooden frames. - Protecting Against Thermal Expansion
Metal flashing accommodates minor frame expansions due to temperature changes, preventing cracking or detachment. Sash window specialists recommend metals like copper and lead for their stability and durability in varying climates. - Enhancing Paint and Finish Longevity
Flashing extends the lifespan of paintwork by preventing water contact with painted surfaces, reducing peeling and repainting frequency. Notably, experts estimate that consistent use of flashing can extend paint longevity by 15–20%, an important consideration for maintaining the aesthetics of sash windows in historic properties. - Increasing Overall Window Lifespan
Sash windows with adequately installed flashing typically last longer, as flashing preserves structural integrity and reduces the need for costly repairs. According to conservation studies, well-installed flashing can extend the lifespan of sash windows by up to 50%, saving significant repair and restoration costs over time.
Best Practices for Installing Flashing on Sash Windows

- Use of Correct Materials
Select flashing materials that complement the sash window’s materials and style. For instance, copper flashing pairs well with traditional wooden frames, while aluminium suits modern installations. Historic England stresses that matching materials is essential in preserving both the integrity and aesthetics of period properties. - Ensure Proper Overlapping
Overlap each flashing piece adequately to prevent gaps, with head flashing overlapping jamb and sill flashing for a continuous waterproof seal. Builders often recommend at least 2–3 inches of overlap to ensure a strong, water-resistant barrier. - Apply Caulking for Additional Sealing
Caulking along the edges of flashing provides extra protection, particularly for exposed areas or regions prone to heavy rain. According to Fine Homebuilding, quality caulking can improve flashing performance by an estimated 10–15%, particularly in exposed installations. - Follow Manufacturer Instructions
Always refer to the manufacturer’s installation guidelines for specific flashing materials to ensure compatibility and effectiveness. Incorrect installation can lead to early flashing failure, significantly increasing maintenance and repair costs.
Maintenance Tips for Sash Window Flashing
- Inspect Annually for Signs of Wear
Check flashing regularly for signs of corrosion, cracks, or gaps, especially after harsh weather. Early detection helps avoid extensive damage. Industry data suggests annual maintenance can extend flashing life by up to 20%. - Clean and Remove Debris
Clean flashing surfaces to prevent debris buildup, which can trap moisture and encourage corrosion. Regular cleaning is particularly important in coastal areas, where salt accumulation accelerates metal degradation. - Re-seal if Necessary
Over time, flashing seals may weaken. Apply new caulking or sealant if you notice any loosening to maintain waterproofing. Sealing can improve flashing performance significantly, with studies showing a 25% improvement in moisture resistance following routine re-sealing. - Repair Damaged Flashing Promptly
If flashing becomes damaged, it’s best to repair or replace it quickly to maintain the protection of your sash window. Delays in flashing repair can lead to costly structural repairs down the line, particularly in wooden sash windows prone to rot.
Key Signs That Sash Window Flashing Needs Replacement
- Visible Corrosion or Rust
Metal flashing exposed to harsh weather conditions may show rust, signalling the need for replacement. Rust can compromise the effectiveness of flashing, leading to water infiltration and window damage. - Loose or Missing Flashing
Any loose or detached flashing pieces indicate a vulnerability to water ingress that should be addressed. Missing flashing is particularly risky during heavy rain, as water can easily enter unprotected areas. - Water Stains on Interior Walls
Watermarks around the sash window frame or on interior walls can suggest that flashing is compromised, allowing moisture to seep through. - Persistent Draughts or Leaks
Inspect the flashing if draughts or water leaks persist, as it may inadequately seal the window frame.
Troubleshooting Common Flashing Problems

- Condensation on Flashing
Condensation may signal improper flashing installation or poor ventilation. Ensure flashing overlaps correctly and check for blocked drainage. - Leaks During Heavy Rain
If water leaks during heavy rain, check for gaps or cracks in the flashing and re-seal as needed. - Flashing Separation from Frame
Temperature fluctuations can cause flashing to separate. Reseal or re-adhere loose flashing with appropriate adhesives. - Corrosion in Coastal Areas
Coastal environments can accelerate flashing corrosion. Consider using corrosion-resistant materials like copper or lead in such regions.
Final Thoughts on Sash Window Flashing
Sash window flashing is essential for protecting your windows from moisture damage and enhancing their lifespan. Proper flashing installation and maintenance make this protective barrier a sound investment for any sash window setup. Ensuring proper flashing maintenance enhances durability and helps avoid costly repairs in the future, especially in environments exposed to frequent rain or high humidity. For traditional sash windows, selecting flashing materials that match the architectural style and offer high durability remains critical in overall window health and longevity.


